Directory services (LDAP)
Setup
We will be using a virtual machine in the faculty's cloud.
When creating a virtual machine in the Launch Instance window:
- Name your VM using the following convention:
scgc_lab<no>_<username>, where<no>is the lab number and<username>is your institutional account. - Select Boot from image in Instance Boot Source section
- Select SCGC Template in Image Name section
- Select the m1.large flavor.
In the base virtual machine:
-
Download the laboratory archive from here in the
workdirectory. Use:wget https://repository.grid.pub.ro/cs/scgc/laboratoare/lab-ldap.zipto download the archive. -
Extract the archive. The
.qcow2files will be used to start virtual machines using therunvm.shscript. -
Start the virtual machines using
bash runvm.sh. -
The username for connecting to the nested VMs is
studentand the password isstudent.
$ # change the working dir
$ cd ~/work
$ # download the archive
$ wget https://repository.grid.pub.ro/cs/scgc/laboratoare/lab-ldap.zip
$ unzip lab-ldap.zip
$ # start VMs; it may take a while
$ bash runvm.sh
$ # check if the VMs booted
$ virsh net-dhcp-leases labvms
Installing 389-ds
The most commonly used Lightweight Directory Access Protocol service (LDAP) on Alma Linux is 389-ds. It is the upstream project / free alternative to the RedHat Directory Server project. In order to set it up, we will need to install it and all of its dependencies.
The configuration of the directory service will be handled using a cockpit
plugin which will need to be installed alongside the other directory server
packages. Cockpit is a web interface that allows you to configure the system
and even run commands on a RedHat-based operating system.
For this lab you will need to install the 389-directory-service module from
the @389 group, cockpit and some additional packages. You can use the
commands below to install them:
[student@lab-ldap ~]$ sudo dnf copr enable -y @389ds/389-directory-server
[student@lab-ldap ~]$ sudo dnf install 389-ds-base cockpit cockpit-389-ds
Creating a LDAP instance
To configure an LDAP instance we will use the instructions in the RHDS configuration guide. For the purposes of this guide, we will use the command line tools that come with the directory service, since they can also be used for automating the process.
The dscreate tool allows creating an instance either by creating a template
that defines various arguments, and then importing it, or creating it
interactively. To run the configuration tool in interactive mode, run it using
the interactive argument, as shown below and then fill the required
parameters.
Make sure you use a password that you will remember for the Directory Manager. You will need it to query the database later.
The password must not contain any spaces.
[student@lab-ldap ~]$ sudo dscreate interactive
Install Directory Server (interactive mode)
===========================================

Enter system's hostname [localhost]: lab-ldap

Enter the instance name [lab-ldap]: lab-ldap

Enter port number [389]: # Press Enter

Create self-signed certificate database [yes]: # Press Enter

Enter secure port number [636]: # Press Enter

Enter Directory Manager DN [cn=Directory Manager]: # Press Enter

Enter the Directory Manager password:   # Enter a password
Confirm the Directory Manager Password: # Re-enter the password

Enter the database suffix (or enter "none" to skip) [dc=lab-ldap]: dc=lab-ldap,dc=scgc,dc=ro

Create sample entries in the suffix [no]: # Press Enter

Create just the top suffix entry [no]: yes

Do you want to start the instance after the installation? [yes]: # Press Enter

Are you ready to install? [no]: yes
Starting installation ...
Validate installation settings ...
Create file system structures ...
Create self-signed certificate database ...
Perform SELinux labeling ...
Create database backend: dc=lab-ldap,dc=scgc,dc=ro ...
Perform post-installation tasks ...
Completed installation for instance: slapd-lab-ldap
You can check that the service and the instance are running using the commands below:
[student@lab-ldap ~]$ sudo dsctl lab-ldap status
Instance "lab-ldap" is running
[student@lab-ldap ~]$ sudo ss -lntp | egrep '389|636'
LISTEN 0      128                *:636             *:*    users:(("ns-slapd",pid=1214,fd=9))
LISTEN 0      128                *:389             *:*    users:(("ns-slapd",pid=1214,fd=8))
Querying the LDAP server
The directory server can be seen as a database where the data is distributed
in a tree-like (directory) hierarchy. The search base (as well as the database
suffix above) specifies its parameters in reverse order. The dc=ro is the
root of the tree, dc=scgc is a directory inside the root, dc=lab-ldap is a
directory inside dc=scgc, and so on.
You can query the LDAP server using the ldapsearch command. It connects to
the server and attempts to query its contents using two types of parameters:
- a search base, specified using the
-bparameter; - a list of attributes of the object.
To extract all the entries in the database that we have created, we can use the following command:
[student@lab-ldap ~]$ ldapsearch -x -b 'dc=lab-ldap,dc=scgc,dc=ro'
# extended LDIF
#
# LDAPv3
# base <dc=lab-ldap,dc=scgc,dc=ro> with scope subtree
# filter: (objectclass=*)
# requesting: ALL
#

# lab-ldap.scgc.ro
dn: dc=lab-ldap,dc=scgc,dc=ro
objectClass: top
objectClass: domain
dc: lab-ldap
description: dc=lab-ldap,dc=scgc,dc=ro

# search result
search: 2
result: 0 Success

# numResponses: 2
# numEntries: 1
For now we only have the top domain. The search will return more entries as you follow the lab and create entries.
Connecting to cockpit
As mentioned before, we will be using cockpit to configure the LDAP server. To enable the cockpit service, run the following command:
[student@lab-ldap ~]$ sudo systemctl enable --now cockpit.socket
Since cockpit is a web console for RedHat-based systems, so you will need to access it from a browser. You can achieve browser access by either:
- using dynamic port forwarding through the virtual machine that you have created in OpenStack;
- using X11 forwarding with a browser window from the virtual machine that you have created in OpenStack (not the LDAP virtual machine).
We recommend using the first option, if possible, since it reduces network traffic the most (only the page's contents are forwarded, instead of a browser window). Some additional setup is required to use it (i.e., you must use Firefox and it is recommended that you create a separate profile where you edit the network settings without changing the default profile).
- Dynamic Port Forwarding
- X11 Forwarding
To use dynamic port forwarding you will need to be able to access the virtual machine directly from your system. If you have not set this up, please review the "Connecting to virtual machines from your system" section in the intro lab.
To create a dynamic port forward between your system and the virtual machine run one of the following commands:
user@local:~$ ssh -fN -D 8220 openstack-10.9.X.Y
# or
user@local:~$ ssh -i ~/.ssh/id_openstack -J user.name@fep.grid.pub.ro -fN -D 8220 student@10.9.X.Y
The SSH process that handles the SOCKS proxy runs in the background, and the port will be kept occupied while the process is running.
The commands above create a dynamic port forward and open the 8220 on your
system for dynamic port forwarding (a SOCKS proxy is created).
Using a proxied connection through a SOCKS proxy is simple using the Firefox browser. We recommend that you use a separate profile for proxied connections to avoid changing your default profile's network settings.
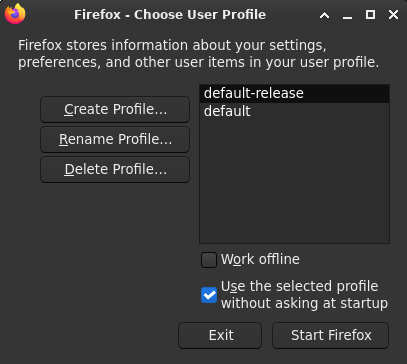
To create a new profile, launch Firefox using the firefox -P command. A
small window will appear that allows you to select a profile to launch, or
manage your profiles. Press the Create Profile... button and follow the
wizard. At the end of the steps do not press Start Firefox using the
new profile.
For this guide we will consider that the profile is named proxy.
To launch the browser with the new profile, run firefox -P proxy.
Every profile keeps a distinct set of settings, so you can use this profile
whenever you need a proxy without changing the settings again (considering
you always use port 8220 as the proxy port).
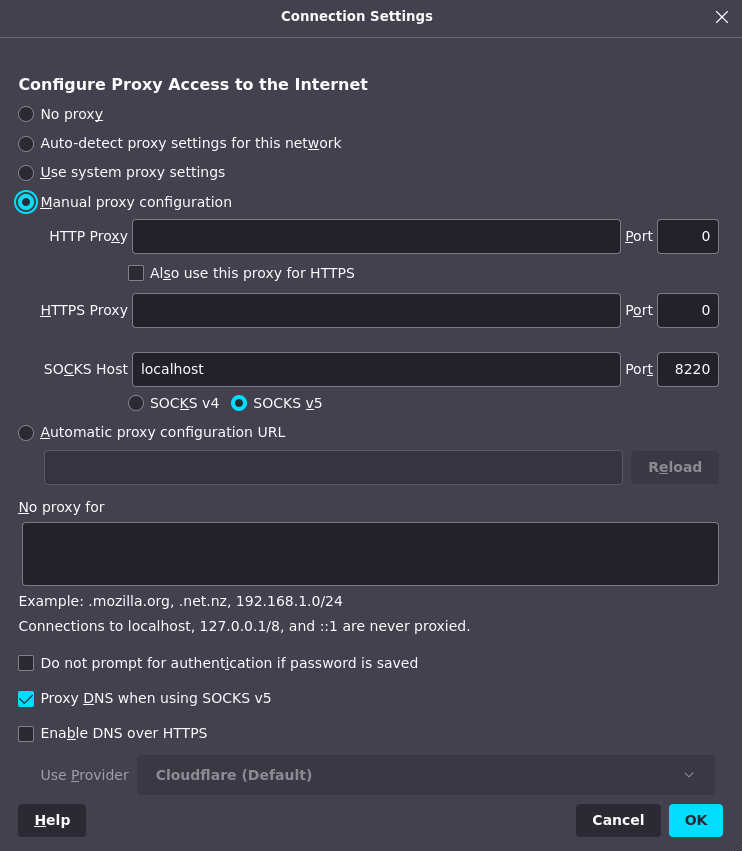
To configure Firefox to use the proxy, go to the browser's settings menu, and
go to Settings → General tab → Network Settings →
Settings.... From here we will select Manual proxy configuration, set
SOCKS Host to localhost, Port to 8220, and enable Proxy DNS when using SOCKS v5.
When forwarding browser windows, most of the window will be static. Because
of this, the transfered data can be compressed to reduce network load. To
enable compression pass the -C argument to ssh for the two connections you
create (to fep, and then to the virtual machine).
For example, when connecting to fep, you can use the following command:
user@local:~$ ssh user.name@fep.grid.pub.ro -X -C -o ServerAliveInterval=100
After connecting to the OpenStack virtual machine, install the latest verion of Firefox and start a window.
student@openstack-vm:~$ sudo apt update
student@openstack-vm:~$ sudo apt install firefox
student@openstack-vm:~$ firefox
Make sure that you use compression for both connections. If the fep connection
is configured in the SSH configuration file and you use proxy jump, you can
add the Compression yes parameter.
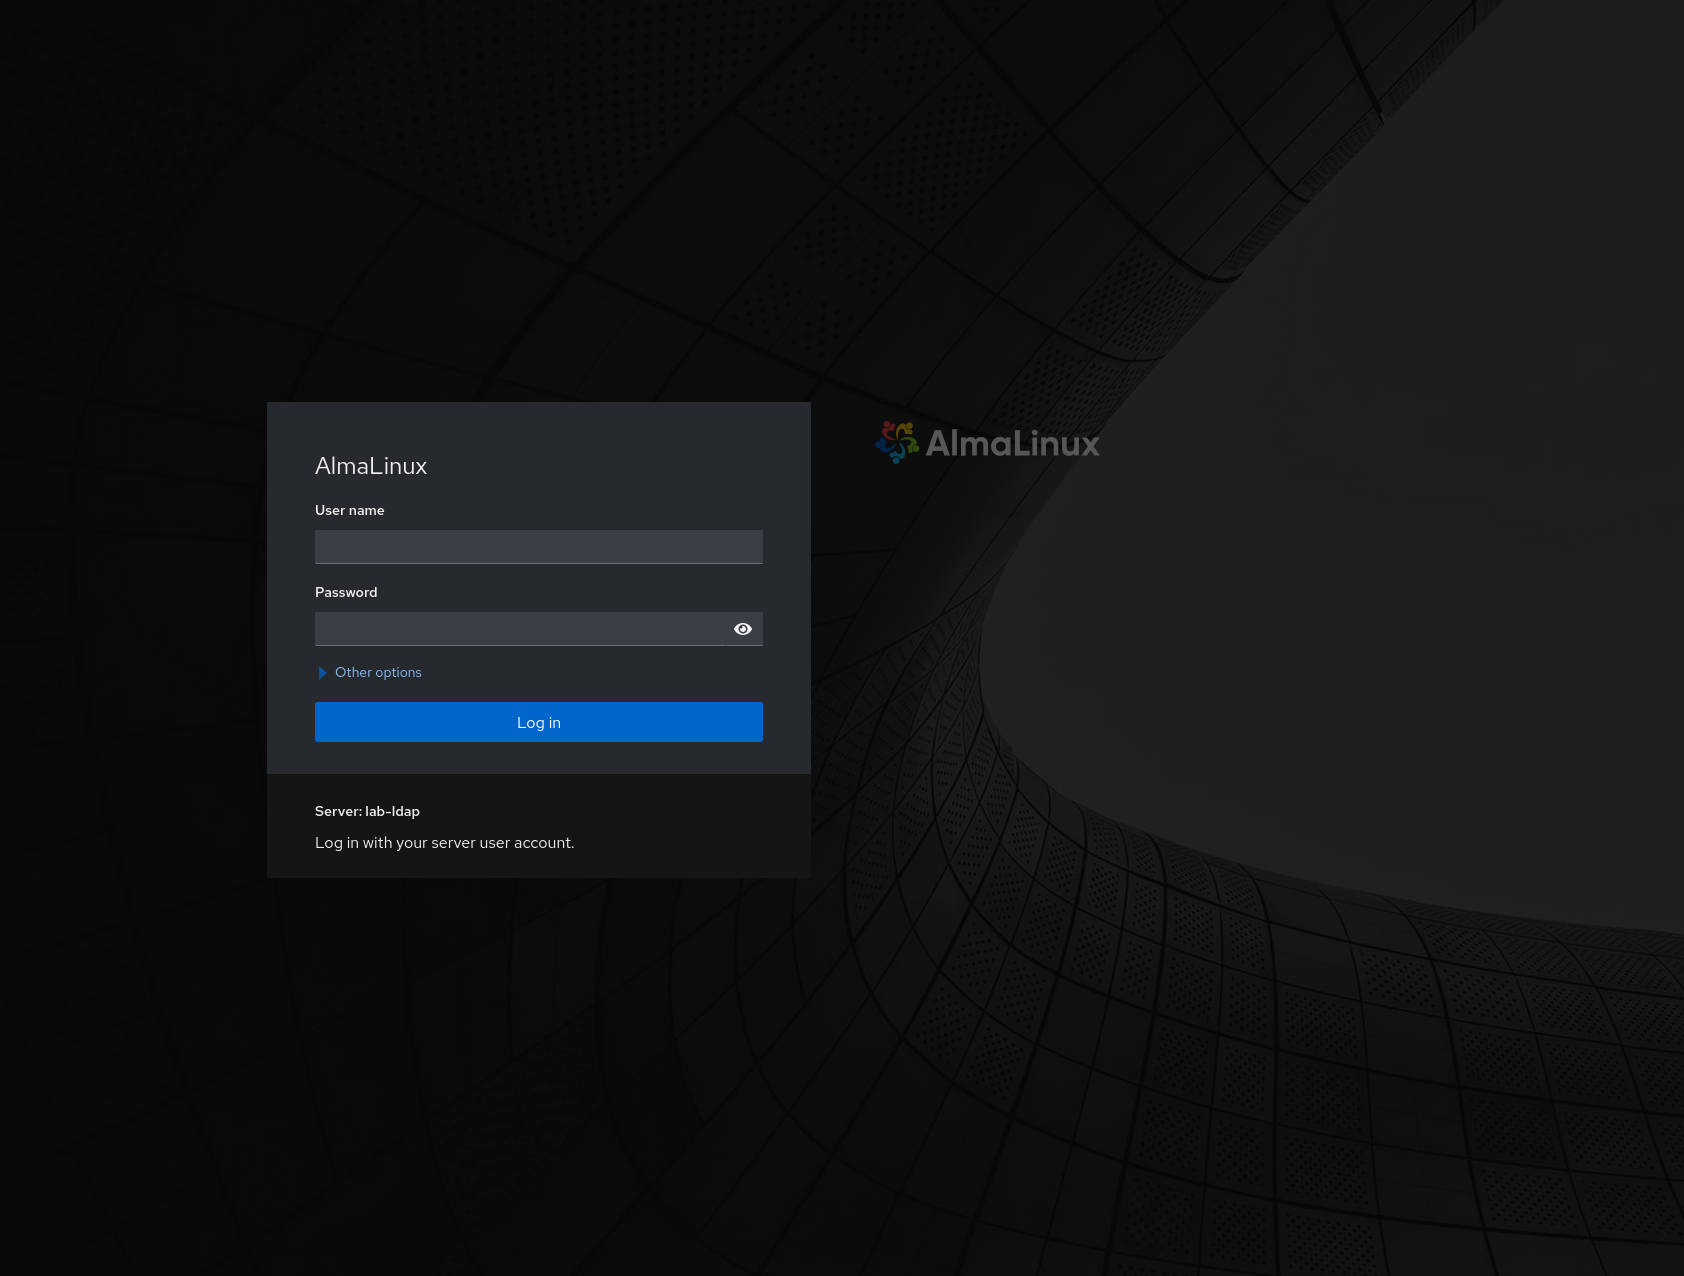
Once you have a browser window that is able to initiate connections through the
OpenStack virtual machine, you will be able to access
https://192.168.100.21:9090 for the cockpit service in the LDAP virtual
machine. Since cockpit uses a self-signed certificate, you will have to accept
it manually by navigating to Advanced... → Accept the Risk and Continue. If the setup did not encounter any errors, you will be greeted by a
login screen similar to the one below.
Authentication on the web console will require root access. Set a password for the root account that you will use to authenticate in cockpit. Make sure that you use a secure password on production systems.
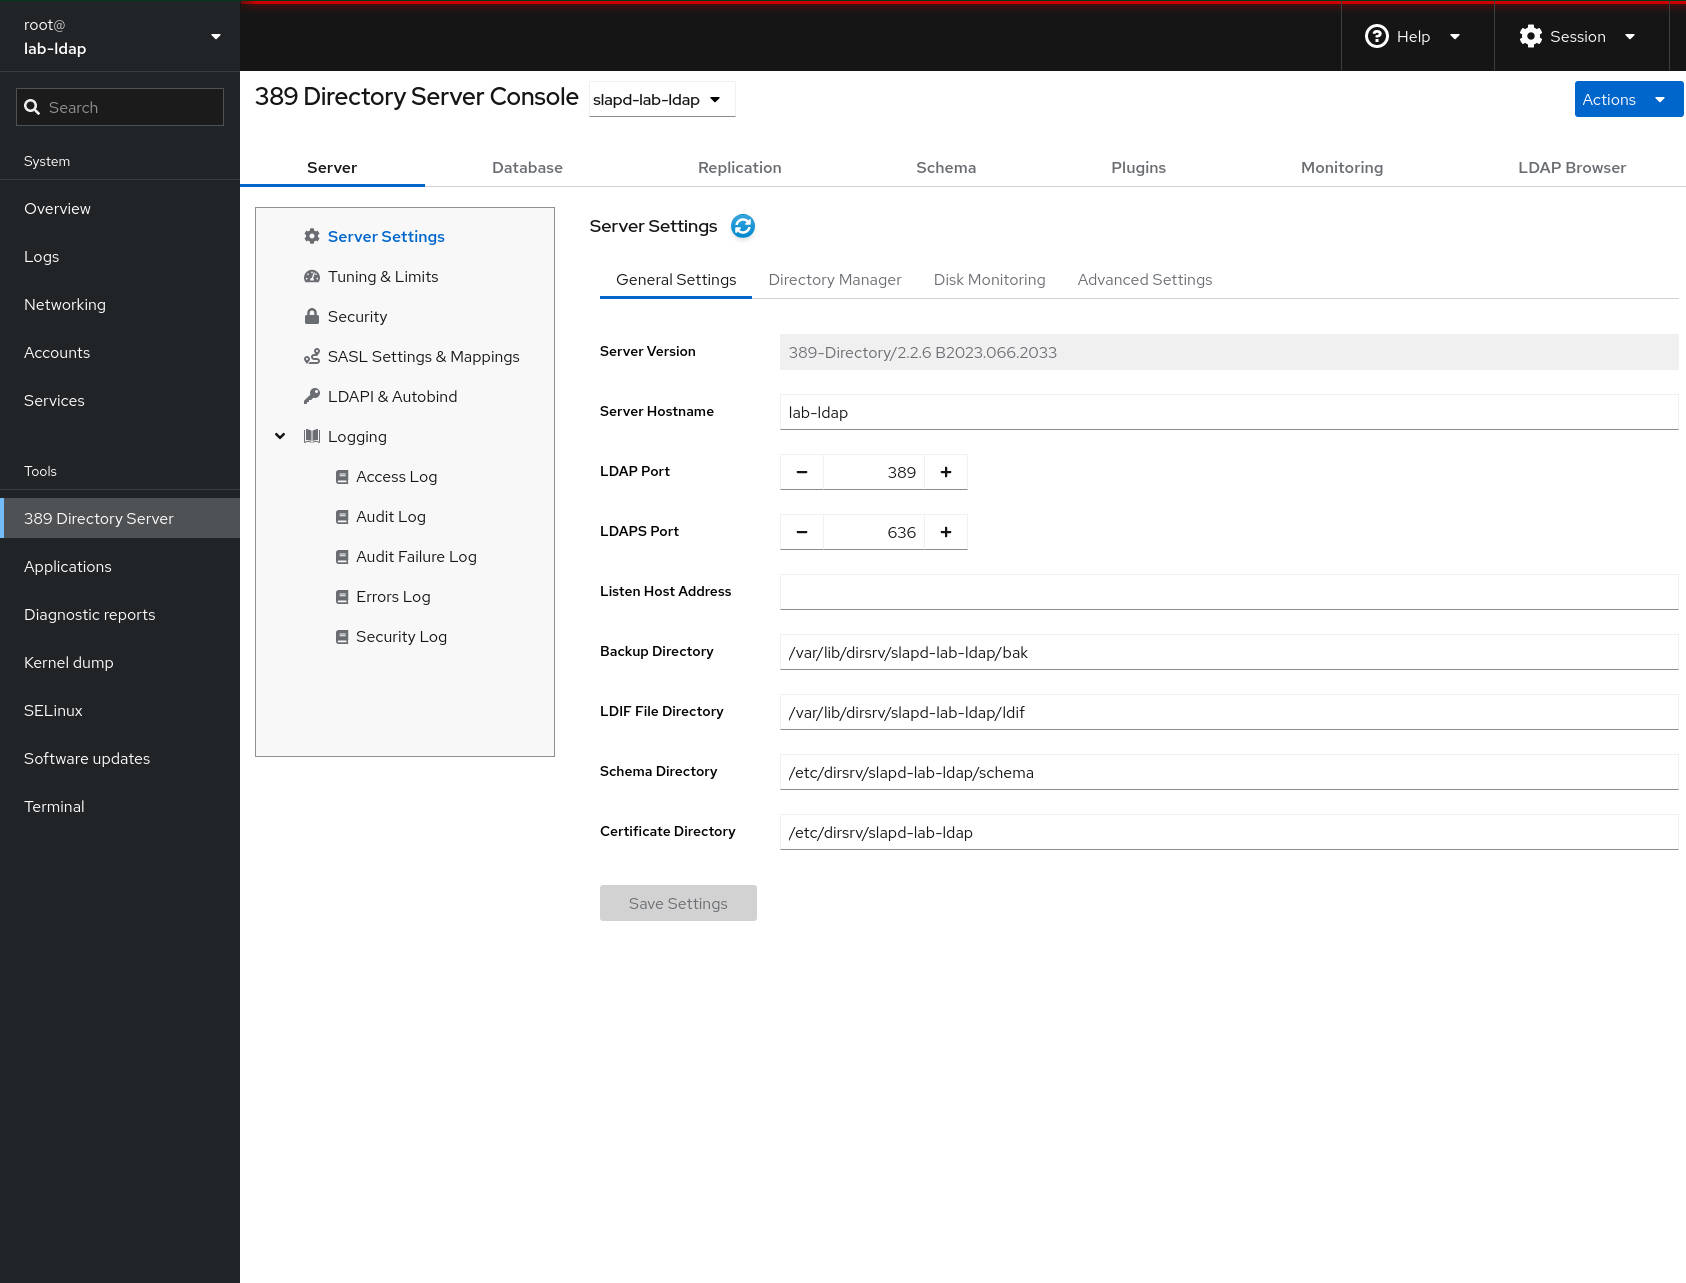
Managing LDAP through cockpit
Cockpit allows you to configure various services, including the directory server. Here, you can manage the instance that you have created through the command line interface, and perform various administrative operations such as starting or stopping an instance, backing up and restoring instances or even creating and deleting them.
The image below shows the server configuration page for the instance that we have configured earlier.
Since LDAP is meant as a database used to store hierarchical information on users and groups, we will focus on how this information can be managed.
Adding users to LDAP
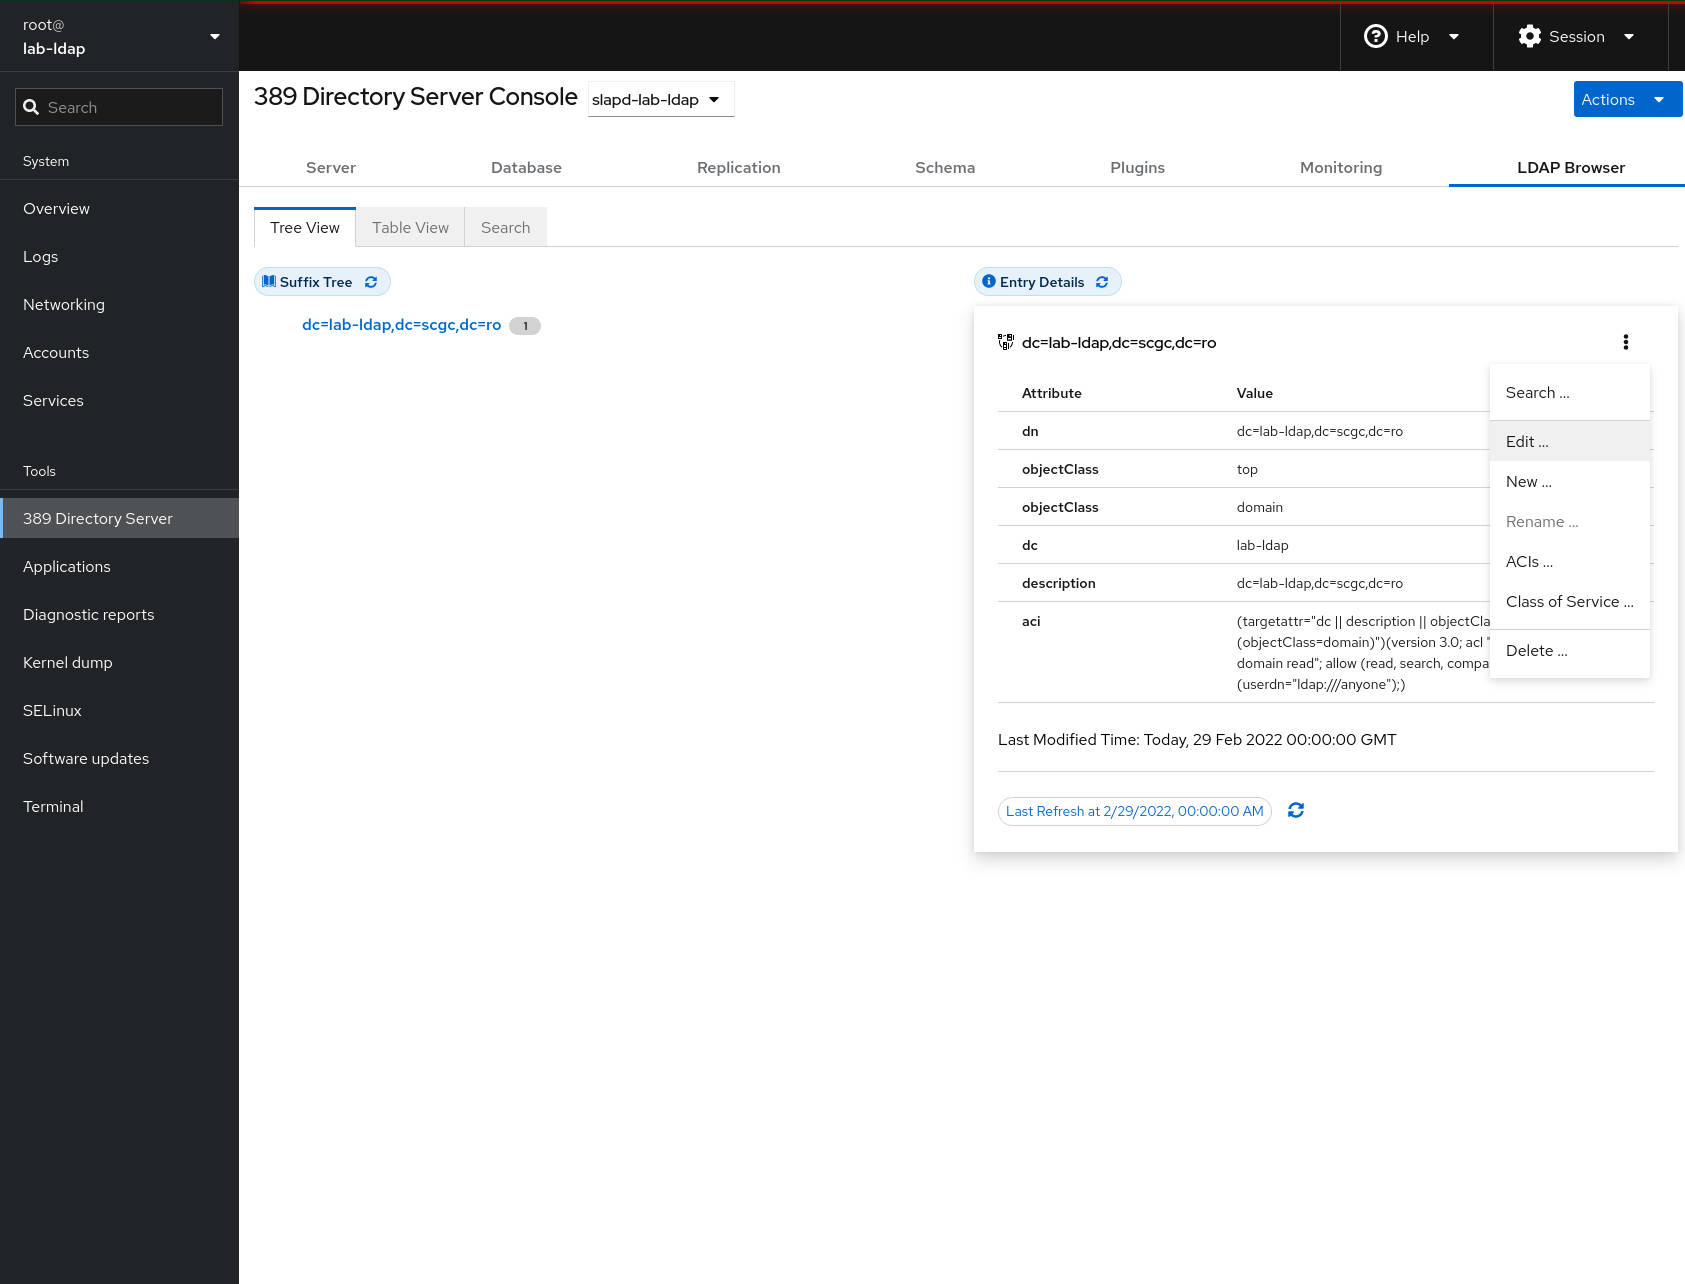
We will begin by adding users to LDAP. First, navigate to the LDAP Browser
tab and then click on the dc=lab-ldap,dc=scgc,dc=ro entry in the Suffix Tree. A new view that contains the entry details will appear, with some
information on the database.
The LDAP server allows us to logically group entities, in order to emulate
an organization's hierarchy. A very basic hierarchy, that we will adopt, is
adding all users in the People organizational unit.
Before adding our first user, we will create an organizational unit. To do
this, click on the options button (the buton with three dots in the top right
corner of the view) and then click on New ....
A new window with options will appear. From here, configure the information
as requested (click the Next button to go to the next step):
- Select
Create a new Organizational Unit; - Select only the
ouattribute. More attributes can be added if required (for example, we could add a phone number), but we will keep the configuration as simple as possible; - Click on the pen button to edit the attribute. In this example we will
create the
Peopleorganizational unit; - Confirm the creation by clicking on
Create.
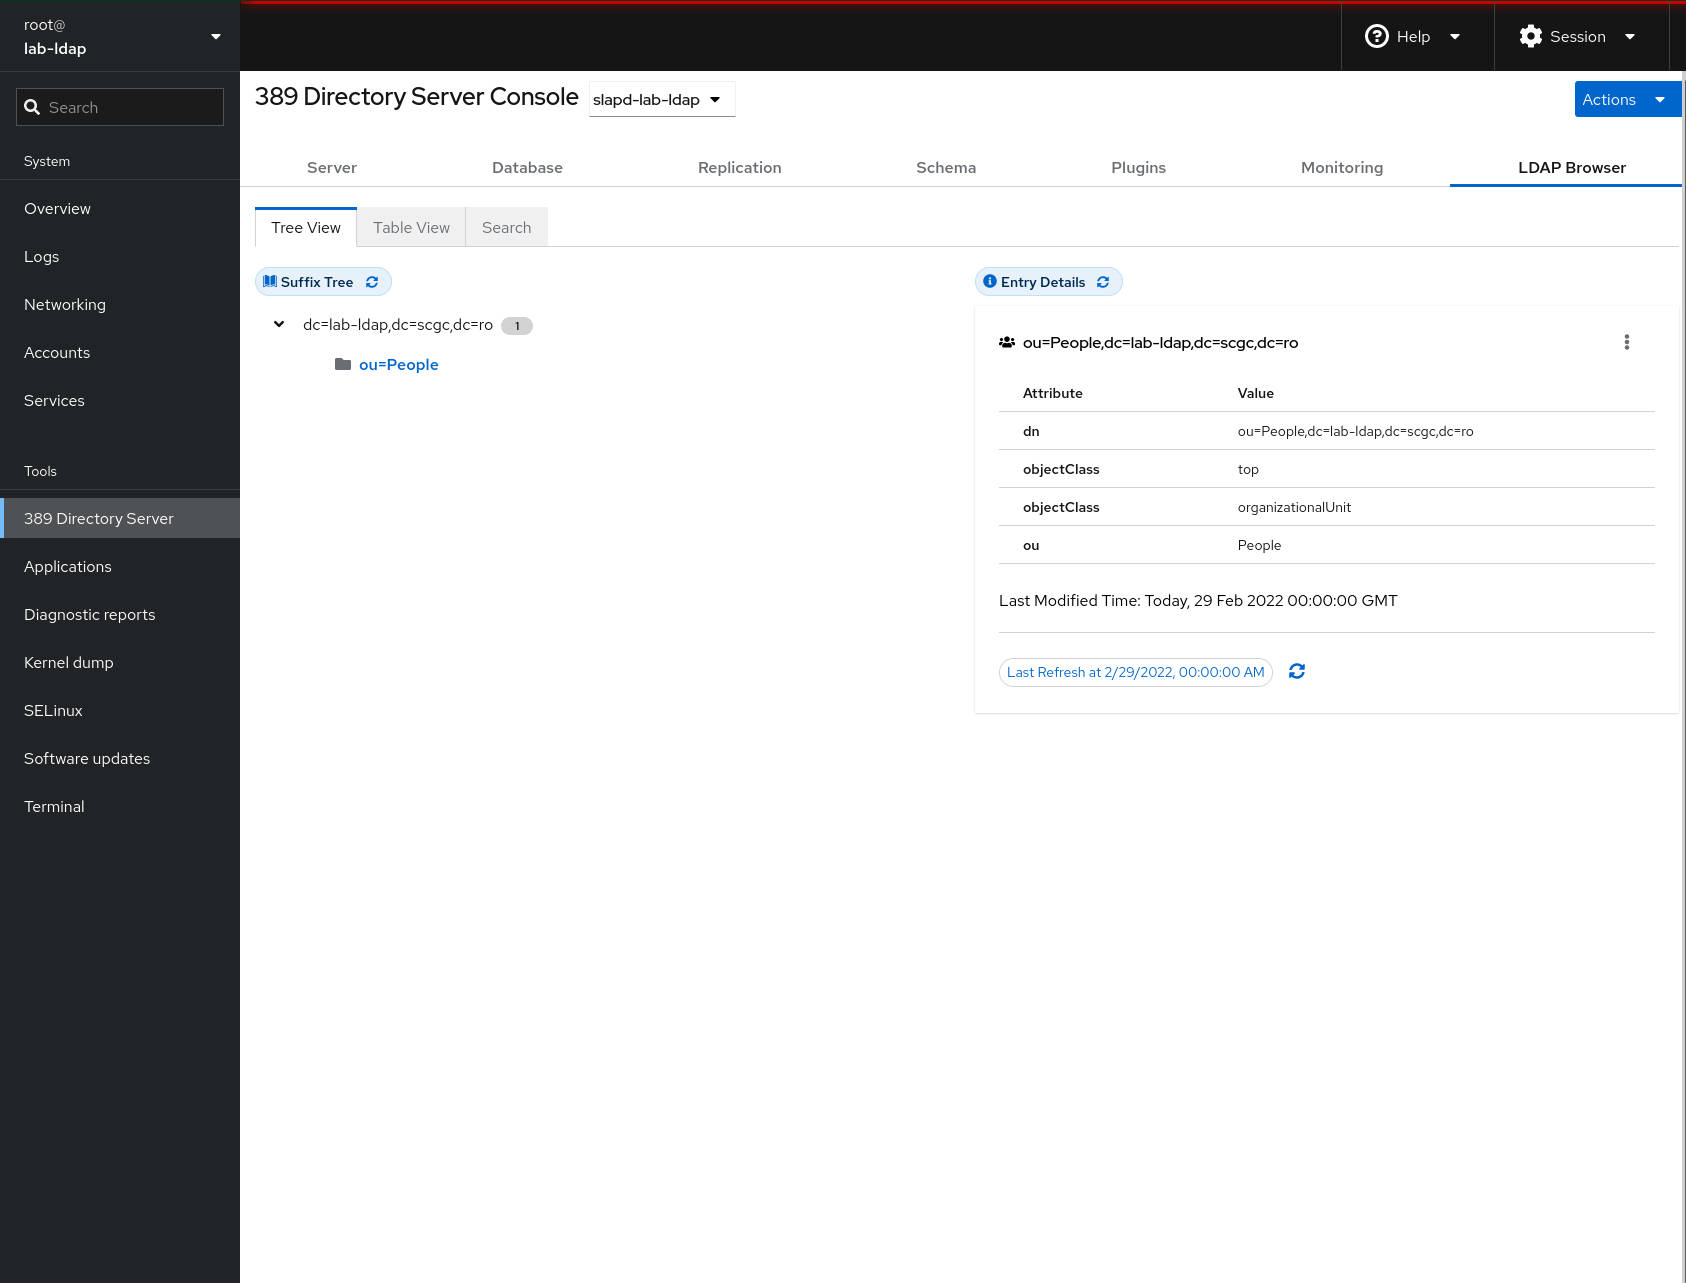
After creating the organizational unit, it will appear under the Suffix Tree
in the new hierarchy. In order to create a new user, we will go the the
People organizational unit's settings and click the New ... button.
From the configuration window, select the following options:
- Select
Create a new custom Entry; - In the
Select ObjectClassessection search forperson, and selectinetorgpersonandperson; - In the
Select Attributessecion select thecn,sn,uidanduserPasswordattributes. TheuidanduserPasswordattributes will be required later to authenticate as the user in a Linux virtual machine; - Set values for the parameters. For this user we will set the following
parameters:
cn=Luke,sn=Skywalker,uid=luke, and whatever password you prefer; - Confirm the creation by clicking on
Create.
At this point we can confirm that the new user is present under the People
organizational unit in the tree view. We can also check that the user
has been created by querying the database from the command line. However,
to be able to access the information, you will need to authenticate as the
Directory Manager.
[student@lab-ldap ~]$ ldapsearch -W -D 'cn=Directory Manager' -x -b 'dc=lab-ldap,dc=scgc,dc=ro'
Enter LDAP Password:
# extended LDIF
#
# LDAPv3
# base <dc=lab-ldap,dc=scgc,dc=ro> with scope subtree
# filter: (objectclass=*)
# requesting: ALL
#

# lab-ldap.scgc.ro
dn: dc=lab-ldap,dc=scgc,dc=ro
objectClass: top
objectClass: domain
dc: lab-ldap
description: dc=lab-ldap,dc=scgc,dc=ro

# People, lab-ldap.scgc.ro
dn: ou=People,dc=lab-ldap,dc=scgc,dc=ro
objectClass: top
objectClass: organizationalUnit
ou: People

# Luke, People, lab-ldap.scgc.ro
dn: cn=Luke,ou=People,dc=lab-ldap,dc=scgc,dc=ro
objectClass: top
objectClass: Person
objectClass: InetOrgPerson
objectClass: organizationalPerson
cn: Luke
sn: Skywalker
uid: luke
userPassword:: <<<< someverylongpasswordhash >>>>

# search result
search: 2
result: 0 Success

# numResponses: 4
# numEntries: 3
In the command above, the -D parameter specifies an identifier for the user
that you will authenticate as in order to extract the data, while -W causes
the tool to interactively ask for the password.
You can refine searches by appending an attribute filter at the end. For
example, you could add '(objectclass=Person)' as a last parameter in order to
only extract entries that have that class type. By default, the filter is set
to (objectclass=*), as shown in the first lines of the output above.
Setting up Posix attributes on the user
To import a user in Linux, a few more parameters are required. Go to the user's
entry in the 389 DS cockpit settings, click on the options button and then
Edit ....
In the edit window, enter the following (after each step press Next):
- Search for the
posixaccountobject class and select it; - Keep the pre-selected attributes selected;
- Fill in the empty attributes:
uidNumber=9900,gidNumber=9900,homedirectory=/home/luke; - Confirm that the attributes are properly set;
- Confirm the changes by pressing
Modify Entry.
Linux authentication using LDAP
LDAP can be used as a central user database for various purposes. In large organizations, in order to more easily keep track of the users (create accounts, grant or revoke access, and suspend permissions), administrators commonly rely on LDAP or a similar services.
The configurations presented in this section are adapted from the Configuring authentication and authorization in RHEL manual and provide a minimal setup.
Before using LDAP to manage access on a system, the sssd package and some
dependencies are required. You can install the packages using the
following command on the same virtual machine as the LDAP server:
[student@lab-ldap ~]$ sudo dnf install nss-pam-ldapd sssd sssd-ldap oddjob-mkhomedir
We can now configure the system to use our local LDAP deployment as a trusted
source using the command below (please note that the --force parameter
may not always be required):
[student@lab-ldap ~]$ sudo authselect select sssd --force
The command above edits system configuration files to use the SSSD service,
that fetches data from LDAP, as a provider for users, groups, and
other data. The --force flag will forcibly override the existing
configurations and may cause the system to misbehave, so please make sure
that you understand the implications.
Edit the /etc/sssd/sssd.conf file and set the following fields:
[domain/default]
id_provider = ldap
auth_provider = ldap
chpass_provider = ldap
ldap_uri = ldap://192.168.100.21
ldap_search_base = dc=lab-ldap,dc=scgc,dc=ro
ldap_default_bind_dn = cn=Directory Manager
ldap_default_authtok_type = password
ldap_default_authtok = <Directory Manager's password>
ldap_user_auth_type = userPassword
ldap_tls_reqcert = allow

[sssd]
services = nss, pam
domains = default

[nss]
homedir_substring = /home
The configuration file must have very restrictive permissions (e.g., 0600).
Otherwise, the service will refuse to read the configurations.
After editing the file, make sure to restart the sssd service. If the
configuration is properly set up, you will be able to get some user information
on the virtual machine:
Do not confuse the SSSD service with the SSH daemon (sshd).
[student@lab-ldap ~]$ getent passwd luke
luke:*:9900:9900:Luke:/home/luke:
[student@lab-ldap ~]$ su luke
Password:
sh-4.4$ pwd
/home/student
sh-4.4$ cd
sh: cd: /home/luke: No such file or directory
From the commands above, you can see that you can authenticate as luke, but
the user's home directory is not created. To automatically create home
directories, the functionality must be enabled using authselect and the
oddjob service must be running.
[student@lab-ldap ~]$ sudo authselect enable-feature with-mkhomedir
Make sure that SSSD service is configured and enabled. See SSSD documentation for more information.

- with-mkhomedir is selected, make sure pam_oddjob_mkhomedir module
  is present and oddjobd service is enabled and active
  - systemctl enable --now oddjobd.service

[student@lab-ldap ~]$ sudo systemctl enable --now oddjobd.service
(Bonus) Create a different bind user
So far, in the examples above we have used the Directory Manager to connect to LDAP and extract user information. In a production environment this is not recommended, since the Directory Manager has full access over the entire database. For this task you will have to:
- create a different user (you do not have to add them in the
Peopleorganizational unit); - grant the new user read-only access on the
Peopleorganizational unit using ACIs (you can find more details here - Defining ACI targets in RHDS).
(Bonus) Enabling certificate validation in SSSD
In the configuration above we have disabled the certificate validation in
SSSD (using ldap_tls_reqcert = allow). Make the required changes to
re-enable the certificate validation. You have some examples in section 3.2
of Configuring authentication and authorization in RHEL.